A Comprehensive Guide: Installing and Utilizing ExpressVPN for Ubuntu in 2023

In today’s increasingly interconnected and digital world, keeping your online activities private and secure has become more important than ever. One of the best ways to achieve this is by using a virtual private network (VPN) software that encrypts your internet connection and masks your IP address. For Ubuntu users, ExpressVPN is a top choice.
ExpressVPN is a leading VPN provider that offers a wide range of features to ensure your online privacy and security. With ExpressVPN, you can select from a vast number of server locations around the world, giving you access to geo-restricted content regardless of your physical location. ExpressVPN also supports various versions of Ubuntu, including the latest 2023 release.
Before you can start using ExpressVPN on your Ubuntu system, you’ll need to download and install the software. To do this, simply visit the ExpressVPN website and sign in to your account. If you don’t have an account yet, you can easily create one. Once you’re logged in, navigate to the “Get ExpressVPN” page to find the appropriate download for your Ubuntu version.
Once the download is complete, open your Terminal and navigate to the location where the ExpressVPN package is saved. Use the following command to install ExpressVPN: sudo apt install ./expressvpn_version.deb. Make sure to replace “version” with the specific version number you downloaded.
After installing ExpressVPN, you can start using it by entering the command expressvpn connect followed by the location alias or numerical code of the server you want to connect to. You can check the available server locations by using the command expressvpn list. Connecting to a server is as simple as typing expressvpn connect location. To disconnect, use the command expressvpn disconnect.
In conclusion, ExpressVPN is the best VPN software to use on Ubuntu, providing a safe and secure online browsing experience. By following these steps, you can download, install, and start using ExpressVPN on your Ubuntu system in no time. Whether you’re looking to unblock geo-restricted content, access streaming services, or explore the web privately, ExpressVPN has all the features you need. So don’t wait, get ExpressVPN for Ubuntu 2023 and benefit from its strict privacy policies and reliable performance.
Downloading and Installing ExpressVPN on Ubuntu
Step 1: Get the ExpressVPN App
First, you need to download the ExpressVPN app for Ubuntu. You can do this by visiting the ExpressVPN website and navigating to the “Get ExpressVPN” page. From there, choose the “Linux” option and click on the “Download” button.
Step 2: Install OpenVPN
ExpressVPN operates using OpenVPN, so you need to ensure that it is installed on your Ubuntu system. Open a terminal and type the following command:
sudo apt-get install openvpn
Step 3: Set Up the ExpressVPN Configuration File
Now, you need to create a configuration file for ExpressVPN. In the terminal, type the following command:
sudo nano /etc/openvpn/expressvpn.conf
Step 4: Get Your ExpressVPN Activation Code
Before you can use ExpressVPN on Ubuntu, you need to obtain an activation code. To get this code, you’ll need an ExpressVPN account. If you don’t have one, sign up for a plan on the ExpressVPN website. Once you have an account, log in and navigate to the “My Account” page. Under “Subscription,” you’ll find your activation code.
Step 5: Configure ExpressVPN

Now that you have the activation code, open the expressvpn.conf file in the terminal using the command mentioned in Step 3. Inside the file, add the following lines:
alias expressvpn='sudo openvpn --config /etc/openvpn/expressvpn.conf'
Save the file and exit the terminal.
Step 6: Connect to ExpressVPN
To connect to ExpressVPN, go to the terminal and type the following command:
expressvpn connect
Step 7: Verify the Connection
To check if ExpressVPN is working and connected to a server, use the following command:
expressvpn status
Step 8: Disconnect from ExpressVPN
If you’re done using ExpressVPN and want to disconnect, type the following command:
expressvpn disconnect
Conclusion
Now you know how to download and install ExpressVPN on Ubuntu, regardless of the operating system you’re using. ExpressVPN is a safe and reliable VPN service that supports private browsing over a network of servers. By following these steps, you can browse the internet securely and access geo-restricted content, even on Ubuntu.
Creating an ExpressVPN Account
If you want to use ExpressVPN on your Ubuntu operating system, you will need to create an account. Here’s a step-by-step guide on how to do it:
Step 1: Browse to the ExpressVPN website
Open a web browser and go to the ExpressVPN website.
Step 2: Sign up for an account
Click on the “Get ExpressVPN” button and choose a plan that suits your needs. ExpressVPN offers different plans with varying features and pricing options.
Step 3: Choose a username and password
Enter a username and password for your ExpressVPN account. Make sure to use a strong password to protect your account.
Step 4: Provide your email address
Enter your email address to receive important account notifications and updates from ExpressVPN.
Step 5: Choose a payment method
Select a payment method that you prefer to use for the subscription. ExpressVPN supports various payment options, including credit cards, PayPal, and Bitcoin.
Step 6: Complete the payment
Follow the instructions to complete the payment process. Once your payment is confirmed, your ExpressVPN account will be created.
Step 7: Download the ExpressVPN app
After creating your account, you will be redirected to the download page. Click on the download button to get the ExpressVPN installer file for Ubuntu.
Step 8: Install ExpressVPN on Ubuntu
Open the terminal on your Ubuntu operating system. Use the “cd” command to navigate to the directory where the ExpressVPN installer file is located. For example, if the file is in the “Downloads” folder, enter “cd Downloads” in the terminal.
Next, run the command “chmod +x filename” to make the installer file executable. Replace “filename” with the actual name of the installer file.
Finally, run the command “sudo ./filename” to initiate the installation process. You may be prompted to enter your password.
Step 9: Log in to your ExpressVPN account
Once the installation is complete, open the ExpressVPN app. Click on the “Sign In” button and enter your ExpressVPN username and password to log in.
Step 10: Connect to a server
With ExpressVPN now installed and ready to use, you can connect to a server of your choice. The app will show you a list of available servers from different locations around the world. Click on a server to connect to it.
Congratulations! You now have an active ExpressVPN account and can browse the internet securely and privately with the benefits of a VPN. Enjoy unblocking restricted content and accessing websites that were previously unavailable to you!
Logging into ExpressVPN on Ubuntu

The first step is to download and install the ExpressVPN app for Ubuntu.
To get started, you’ll need an ExpressVPN account. If you don’t have one already, you can sign up for a plan on the ExpressVPN website. Once you have an account, you can proceed with the following steps.
Step 1: Download and install ExpressVPN
Visit the ExpressVPN website and select the appropriate download for Ubuntu. The file will have a .deb extension. Once the file is downloaded, locate it in your file manager and double-click to start the installation process. Follow the on-screen instructions to complete the installation.
Step 2: Login to your ExpressVPN account
Launch the ExpressVPN app on your Ubuntu operating system. You will be prompted to log in with your ExpressVPN account credentials. Enter your email address and password and click “Sign In” to proceed.
Step 3: Connect to a VPN server
Once you are logged in, you will see the main interface of the ExpressVPN app. Here, you can select a server location from the list of available options. Click on a location to connect to the VPN server in that country.
Step 4: Enable automatic connection
If you want ExpressVPN to connect automatically each time you start your Ubuntu system, click on the gear icon in the top-right corner of the app interface. Then, go to the “Options” tab and select the “General” section. Toggle the switch for “Connect to VPN on device startup” to enable this feature.
Step 5: Confirm your VPN status
To confirm that your Ubuntu system is now using ExpressVPN, you can visit a website like whatismyip.com to see if your IP address has changed to the one associated with your VPN server location.
Conclusion
Logging into ExpressVPN on Ubuntu is a straightforward process that provides you with a safe and secure way to browse the web. With features like automatic connection and a wide range of server locations to choose from, ExpressVPN delivers a fast and private browsing experience that is better than using your regular network connection.
Connecting to a VPN Server Using ExpressVPN on Ubuntu
Step 1: Download and Setup ExpressVPN
To begin using ExpressVPN on your Ubuntu operating system, you will first need to download and install ExpressVPN. ExpressVPN offers different plans and pricing options, so you can choose the one that suits your needs best. Once you have selected the plan, proceed to download the ExpressVPN installer for Ubuntu. Make sure to download the appropriate version based on your operating system version.
After the installer is downloaded, locate the file and open it. Follow the on-screen instructions to complete the installation process. Once the installation is complete, ExpressVPN is ready to be used.
Step 2: Configuring ExpressVPN
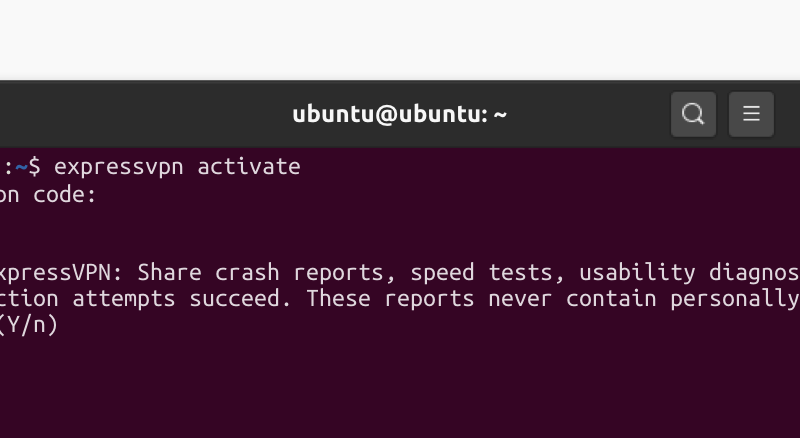
To configure ExpressVPN on Ubuntu, open the Terminal app by clicking on the Applications icon and searching for “Terminal.” With the Terminal open, type the following command: expressvpn init. This will generate the ExpressVPN configuration file.
After running the command, you will be prompted to enter your ExpressVPN activation code. Copy and paste the code into the Terminal and press Enter. ExpressVPN will then connect to the fastest server available.
Step 3: Connecting to a VPN Server
To connect to a VPN server using ExpressVPN on Ubuntu, use the following command: expressvpn connect. This command will connect you to the fastest server available based on your current location. You can also specify a specific location by using the expressvpn connect LOCATION_ALIAS command, where LOCATION_ALIAS is the alias of the desired location.
Once connected, ExpressVPN will deliver all your internet traffic through a safe and encrypted connection, allowing you to browse the web anonymously and securely. With ExpressVPN, you can explore geo-restricted content from around the world and access services that may not be available in your location.
Step 4: Disconnecting from the VPN Server
To disconnect from the VPN server, simply use the command expressvpn disconnect. This will terminate the connection and revert your internet traffic to its usual state.
Conclusion
Using ExpressVPN on Ubuntu is a great way to ensure your online privacy and security. With easy installation and setup steps, ExpressVPN provides fast and reliable VPN servers to deliver the best browsing experience. Whether you’re working, streaming, or exploring the digital world, ExpressVPN is an excellent tool to keep your connection secure and your data private.
Choosing a VPN Server Location with ExpressVPN on Ubuntu
When using ExpressVPN on your Ubuntu operating system, you will have the ability to select the server location that best suits your needs. This strict control over server selection ensures that you will be able to access content that is normally restricted in your location, as well as enjoy faster connection speeds.
Installing ExpressVPN on Ubuntu is a straightforward process. First, you need to download the ExpressVPN app for Ubuntu from the official website. Once downloaded, open the terminal and navigate to the directory where the file is saved.
Next, you will need to install the app using the command: sudonanoetcopenvpnnexpressvpnconf. This command will install the ExpressVPN app and set up the necessary configuration files.
Now that the app is installed, you can launch it and sign in with your ExpressVPN account credentials. Once you’re logged in, the app will show you a list of available server locations. You can either choose the best server location automatically or manually select a specific server from the list.
If you’re unsure which server location to choose, ExpressVPN offers a helpful feature called “Smart Location” that automatically selects the best server for you based on factors like speed and distance. This ensures that you’re always getting the fastest and most reliable connection possible.
Regardless of which server location you choose, using ExpressVPN on Ubuntu comes with many benefits. Not only will it encrypt your internet connection and protect your privacy, but it will also allow you to bypass geographical restrictions and access content from around the world.
It’s worth mentioning that ExpressVPN also supports other devices, such as Android, so you can enjoy the same benefits on all your devices. Whether you’re using ExpressVPN on Ubuntu or any other platform, you can rest assured that your online activities are secure and private.
In conclusion, choosing a VPN server location with ExpressVPN on Ubuntu is a simple task. Just follow the steps mentioned above to install and use ExpressVPN on your Ubuntu operating system. The app’s features and strict server selection ensure that you have the best possible VPN experience, regardless of your location or the content you’re trying to access.
Configuring ExpressVPN Settings on Ubuntu
If you are using ExpressVPN on Ubuntu, it is important to configure the settings properly to ensure smooth operation. Here’s a step-by-step guide to help you set it up:
Step 1: Installing ExpressVPN
First, you need to download and install the ExpressVPN app for Ubuntu. To do this, open the terminal and run the following command:
sudo apt-get install expressvpn
Step 2: Setting up ExpressVPN
Once the installation is complete, open the ExpressVPN app and log in using your account credentials. If you don’t have an account, you can sign up for one on the ExpressVPN website.
Step 3: Choosing the Server Location
ExpressVPN provides a list of servers available in different locations around the world. You can select the server location you want to connect to, based on your needs. Choosing the closest and fastest server to your location will ensure optimal speed.
Step 4: Connecting to a Server
To connect to a server, simply click on the “Connect” button in the ExpressVPN app. This will establish a secure and private connection between your device and the selected server, providing you with a masked IP address and encrypted data transfer.
Step 5: Checking the Connection Status
You can check the status of your ExpressVPN connection in the app. It will display whether you are connected or disconnected from the server. If you ever need to disconnect, simply click on the “Disconnect” button.
Step 6: Enjoying the Benefits
Once you are connected to an ExpressVPN server, you can now enjoy all the benefits it offers. You can browse the web, stream geo-restricted content, use online services, and more, with the assurance of privacy and security.
Step 7: Checking for Updates
ExpressVPN regularly releases updates for its Linux version. It is important to check for updates to ensure you are using the latest version, which may include bug fixes and additional features. To check for updates, run the following command in the terminal:
sudo apt-get update && sudo apt-get install expressvpn
Step 8: Exploring Additional Features
ExpressVPN offers various features that you can explore on Ubuntu. Some of these include split tunneling, which allows you to choose which apps use the VPN connection, and network lock, which ensures your data is protected even if the VPN connection drops.
By following these steps, you can configure and use ExpressVPN on Ubuntu to enhance your online privacy, security, and browsing speed.
Enabling the Kill Switch Feature in ExpressVPN for Ubuntu
When it comes to protecting your online privacy and ensuring a secure connection, ExpressVPN is one of the most reliable options available. With its easy-to-use software and fast connection speeds, it is the go-to choice for many users around the world.
One of the key features of ExpressVPN is its kill switch, which adds an extra layer of security to your internet connection. The kill switch automatically blocks internet traffic if the VPN connection drops, preventing your personal information from being exposed.
Step 1: Download and install ExpressVPN for Ubuntu
To enable the kill switch feature, you must first have ExpressVPN installed on your Ubuntu system. Visit the ExpressVPN website and download the appropriate version for Ubuntu. Once the file is downloaded, open the Terminal and navigate to the directory where the file is located.
Step 2: Confirming the kill switch feature availability
Before enabling the kill switch, you need to confirm that your version of ExpressVPN for Ubuntu supports this feature. Open the Terminal and enter the command: “expressvpn –version”. If the output includes the text “Kill Switch”, you’re good to go. If not, you may need to upgrade to a newer version.
Step 3: Enabling the kill switch
To enable the kill switch, open the Terminal and enter the command: “expressvpn preferences set network_lock on”. This will turn on the kill switch feature for ExpressVPN.
Once the kill switch is enabled, ExpressVPN will automatically block any internet traffic if the VPN connection drops. This ensures that your private information remains secure, regardless of your network connection status.
Step 4: Testing the kill switch
To test the kill switch, simply disconnect from the VPN by clicking the “Disconnect” button in the ExpressVPN app. Then, try accessing a website or online service. If the kill switch is working correctly, you should not be able to establish a connection.
Enabling the kill switch feature in ExpressVPN for Ubuntu is a simple and effective way to enhance your online security. It ensures that your personal information remains safe and protects you from potential vulnerabilities, especially when connected to public Wi-Fi networks or accessing geo-restricted content.
Using Split Tunneling with ExpressVPN on Ubuntu
If you’re an Ubuntu user and you want to take advantage of ExpressVPN’s split tunneling feature, you’re in luck. Split tunneling allows you to choose which traffic goes through the VPN and which bypasses it. This can be useful for a variety of reasons, such as optimizing your internet speed or accessing geo-restricted content.
To use split tunneling with ExpressVPN on Ubuntu, you should start by installing the software. ExpressVPN offers a version specifically designed for Ubuntu, which you can download from their website. Once you’ve downloaded the installer, you can use the command “sudonanoetcopenvpnnexpressvpnconf” to open the configuration file.
Within the configuration file, you’ll find a section titled “split tunneling”. Here, you will be able to specify which apps or websites you want to exclude from the VPN connection. For example, you can add the names of specific servers you want to connect to directly, or you can add a general “allowlist” of websites that should bypass the VPN. Once you’ve made the necessary changes, save the file and exit.
After confirming that you have set up split tunneling correctly, you can start using ExpressVPN on Ubuntu. The benefit of split tunneling is that you can enjoy the best of both worlds – using ExpressVPN to secure your connection and access geo-restricted content, while still having the freedom to connect to local or specific servers without going through the VPN. This provides a convenient and flexible solution for Ubuntu users who want to use ExpressVPN in the most efficient way possible.
In conclusion, using split tunneling with ExpressVPN on Ubuntu is a great way to get the most out of the software. Whether you’re looking to optimize your internet speed or unblock geo-restricted content, ExpressVPN’s split tunneling feature can help you achieve your goals. Regardless of which version of Ubuntu you are using or which plan you have with ExpressVPN, split tunneling is a valuable tool that can enhance your online experience.
Disconnecting from ExpressVPN on Ubuntu
To disconnect from ExpressVPN on Ubuntu, you can follow these simple steps:
- First, ensure that the ExpressVPN app is still working and connected. If you’re unsure, you can check the app to confirm.
- If the app is still working, you shouldn’t have any issues disconnecting. Simply click on the “Disconnect” button within the app, and your connection to ExpressVPN will be terminated.
- What if the ExpressVPN app is not working? In that case, you can use the command line to disconnect manually. Open a terminal and type the following command:
expressvpn disconnect. - If you have set up an alias for the expressvpn command, you can use it instead. For example, if you have set up an alias “vpn” for the expressvpn command, you can type:
vpn disconnectto disconnect from ExpressVPN. - After executing the command, ExpressVPN will disconnect and your network traffic will no longer be routed through the VPN servers.
It’s important to note that disconnecting from ExpressVPN on Ubuntu will not disable the app or remove any of its features. You can still use the app and its functions even when disconnected.
If you are using ExpressVPN on multiple devices, you should also disconnect from the VPN on those devices, if needed. This will ensure that your network traffic is no longer being routed through ExpressVPN.
When it comes to ExpressVPN, it is known for its reliable and fast servers. With over 160 server locations available, you can easily find the one that suits your needs the best. ExpressVPN also supports the latest version of Ubuntu, ensuring a smooth and safe installation process. Whether you want to unblock websites, enhance your online security and privacy, or simply improve your internet speed, ExpressVPN is the go-to choice.
Troubleshooting ExpressVPN Issues on Ubuntu
Using ExpressVPN on Ubuntu is a great way to ensure a private and secure browsing experience. However, occasionally, you may encounter some issues while installing or using ExpressVPN on Ubuntu. Here are some troubleshooting steps you can follow to resolve these issues:
1. Check Your Operating System Version
Before installing ExpressVPN on Ubuntu, you should ensure that you are using the latest version of the operating system. Upgrading to the latest version can often resolve compatibility issues.
2. Verify the Installation
If you encounter issues during the installation process, double-check that you have followed the correct steps outlined in the ExpressVPN installation guide for Ubuntu. Ensure that you have downloaded the correct installer file and that you are using the appropriate command to install ExpressVPN.
3. Copy ExpressVPN Configuration File
If the ExpressVPN configuration file isn’t properly set up, you may experience connection issues. To resolve this, simply open a terminal and enter the command sudo nano /etc/openvpn/expressvpn.conf. Copy the configuration provided by ExpressVPN into this file and save it.
4. Check Connection Status
If you’re experiencing slow speeds or frequent disconnections, it’s worth checking the connection status. You can do this by running the command expressvpn status. If the status indicates any issues, you can follow the troubleshooting steps provided by ExpressVPN to resolve the problem.
5. Verify Server Locations
If you’re trying to unblock geo-restricted content and it’s not working, double-check that you have selected a server location that supports the content you’re trying to access. ExpressVPN provides a list of supported server locations on their website.
6. Consider Device Compatibility
If you’re using ExpressVPN across multiple devices, ensure that all of your devices meet the minimum system requirements. Different devices may require different versions of ExpressVPN, so be sure to download the appropriate version for each device.
7. Contact ExpressVPN Support
If you’ve followed all the troubleshooting steps and are still experiencing issues, it’s best to reach out to ExpressVPN’s customer support. They can provide personalized assistance and help you resolve any persistent issues.
Conclusion
ExpressVPN offers excellent features for browsing safely and unblocking geo-restricted content. However, if you encounter any issues while using ExpressVPN on Ubuntu, these troubleshooting steps should help you identify and resolve the problem. Remember to always keep your operating system and ExpressVPN up to date for the best experience.
Checking the ExpressVPN Connection Status on Ubuntu
Once you have installed and set up ExpressVPN on your Ubuntu device, it’s important to be able to check the connection status to ensure you are securely connected and able to browse the internet without any geo-restricted limitations.
Step 1: Open the ExpressVPN App
To check your connection status, you will need to open the ExpressVPN app on your Ubuntu device. If you haven’t installed it yet, you can download the installer file from the ExpressVPN website.
Step 2: Sign in to Your Account
Once the app is open, sign in to your ExpressVPN account using your username and password. If you don’t have an account yet, you can create one by following the on-screen instructions. ExpressVPN offers different plans and features, so choose the one that suits your needs best.
Step 3: Confirm Your Connection Status
Within the ExpressVPN app, you will see a list of server locations you can connect to. Look for the status or connection information, which will show whether you are currently connected to a server or not. It will also show your current IP address and the location of the server you are connected to.
Step 4: Check Your Network Settings
If the status shows that you are not connected, you can check your network settings to ensure everything is set up correctly. Make sure your internet connection is stable and that you have selected the correct server location within the app.
Step 5: Show advanced options
If you want to explore more advanced options, you can click on the three dots or hamburger menu in the top-right corner of the app. This will provide you with additional features and settings to customize your ExpressVPN experience.
Step 6: Browse Safely and Securely
Once you have confirmed that your ExpressVPN connection is active and secure, you can browse the internet knowing that your data is encrypted and your privacy is protected. ExpressVPN is known for providing the fastest and most reliable servers, so you can enjoy a seamless browsing experience regardless of your location.
Even if you’re using ExpressVPN with your Ubuntu device, it’s always a good idea to periodically check the connection status to ensure everything is working as it should. By following these simple steps, you can stay connected and browse the web safely and securely.
Verifying ExpressVPN DNS Leak Protection on Ubuntu
When using ExpressVPN on Ubuntu, it is important to verify that DNS leak protection is enabled to ensure your online privacy and security. Here’s how you can check if DNS leak protection is working on your Ubuntu device:
Step 1: Install ExpressVPN on Ubuntu
To begin, you will need to download and install ExpressVPN on your Ubuntu device. If you haven’t done so already, log in to your ExpressVPN account and navigate to the “Set Up ExpressVPN” page. From here, select the “Linux” option and click on the “Download” button to save the installer file to your computer.
Step 2: Install ExpressVPN
Once the installer file has been downloaded, open a terminal window and navigate to the directory where the file is located. Enter the command “sudo dpkg -i expressvpn_2023_amd64.deb” to start the installation process. Follow the on-screen instructions to complete the installation.
Step 3: Verify DNS Leak Protection
After installing ExpressVPN, launch the ExpressVPN app by entering the command “expressvpn” in the terminal. The app will display the status of your connection, available server locations, and other useful information about your ExpressVPN account.
Now, to verify if DNS leak protection is enabled, enter the command “expressvpn diagnostics” in the terminal. This command will perform a series of tests to check if your DNS requests are being properly routed through ExpressVPN’s secure servers.
Step 4: Confirm DNS Leak Protection
After running the diagnostics command, you will see a list of test results. Look for the line that says “DNS” and check if it’s marked as “OK“. If the status shows “OK“, it means that ExpressVPN’s DNS leak protection is working as intended, and your DNS requests are being secured.
If the DNS test shows a warning or an error, it means that there might be a DNS leak issue. In this case, you can try reconnecting to a different ExpressVPN server or contact ExpressVPN’s customer support for further assistance.
Conclusion
Verifying ExpressVPN DNS leak protection on Ubuntu is an essential step to ensure your online privacy and security. By following the steps outlined above, you can confirm that your DNS requests are securely routed through ExpressVPN’s servers, providing you with a secure and private browsing experience.
Testing Internet Speed with ExpressVPN on Ubuntu
When using ExpressVPN on Ubuntu, it’s important to check your internet speed to ensure that you’re getting the best possible connection. Fortunately, ExpressVPN provides a simple and safe way to test your internet speed within its setup.
Step-by-Step Guide: How to Test Internet Speed with ExpressVPN on Ubuntu
- Open the ExpressVPN app on your Ubuntu operating system. If you haven’t installed it yet, refer to our previous guide on “How to Install and Use ExpressVPN for Ubuntu”.
- Select a server location that you want to test your internet speed with. ExpressVPN has a wide variety of servers available around the world, so you can choose the one that best suits your needs.
- Click on the “Speed Test” tab within the ExpressVPN app.
- Click on the “Start Test” button to begin the speed test.
- ExpressVPN will now test your internet speed from the selected server. It will measure the download and upload speeds, as well as the ping.
- Once the test is complete, ExpressVPN will display the results. You can check your download and upload speeds, as well as the ping to determine the quality of your connection.
Conclusion:
Testing your internet speed with ExpressVPN on Ubuntu is a quick and easy process. By following these steps, you can ensure that you’re getting the fastest and most reliable connection while using ExpressVPN. Whether you’re downloading files, streaming geo-restricted content, or just browsing the web, it’s important to regularly check your internet speed to make sure it meets your needs.
Changing ExpressVPN Protocol Settings on Ubuntu
If you’re an Ubuntu user, you may already be aware of the benefits of using ExpressVPN for added privacy and security. However, did you know that you can also change the protocol settings within ExpressVPN on your Ubuntu device? This can help improve your connection speed and overall performance. Here’s how to do it:
Step 1: Open Terminal
To start, open the terminal on your Ubuntu device. You can do this by searching for “terminal” in the applications menu, or by using the shortcut Ctrl+Alt+T.
Step 2: Browse to the ExpressVPN Configuration Files
Next, navigate to the ExpressVPN configuration files in your terminal. To do this, use the command sudo nano /etc/openvpn/expressvpn.conf. This will open the ExpressVPN configuration file in the Nano text editor.
Step 3: Change the Protocol Settings
Once the configuration file is open, you will see the protocol settings near the top of the file. By default, ExpressVPN uses the OpenVPN protocol. If you want to change it to a different protocol, such as IKEv2 or UDP, you can simply edit the corresponding line. Make sure to save your changes before exiting the text editor.
Step 4: Confirm the Change
To confirm that the protocol settings have been changed, you can use the command expressvpn status in the terminal. This will show you the current status of your ExpressVPN connection, including the protocol that you are now using.
By following these steps, you can easily change the protocol settings within ExpressVPN on your Ubuntu device. This can provide you with a better connection that is tailored to your specific needs. Don’t forget to always check for updates and new software versions to ensure you have the best experience possible with ExpressVPN.
Updating ExpressVPN on Ubuntu
If you are using ExpressVPN on Ubuntu, you may want to update the software to ensure you have the latest features and security improvements. Updating ExpressVPN on Ubuntu is a simple process, and this guide will walk you through the steps.
Step 1: Check for Updates
Before updating ExpressVPN, it is a good idea to check if there are any updates available. To do this, open the ExpressVPN app on your Ubuntu device and navigate to the “Options” or “Settings” menu. Look for an “Update” or “Check for Updates” button and click on it.
Step 2: Download the Latest Version
If there is an update available, the app will prompt you to download the latest version. Click on the download link and save the installer file to a location on your system.
Step 3: Install the Update
Once the download is complete, navigate to the location where you saved the installer file. Right-click on the file and select “Copy” to safely save a copy of the installer in case anything goes wrong during the installation process.
Step 4: Run the Installer
To install the update, open a terminal window and navigate to the location where you saved the installer file. Use the command “./expressvpn_2023_update_installer.sh” to run the installer.
Step 5: Follow the On-Screen Instructions
Follow the on-screen instructions to complete the installation process. You may be prompted to enter your ExpressVPN account credentials, so make sure you have them ready.
Step 6: Disconnect and Reconnect
Once the update is installed, it is recommended to disconnect and reconnect to the ExpressVPN network. This will ensure that the new version is working properly.
Congratulations! You have successfully updated ExpressVPN on your Ubuntu device. Now you can browse the web with the latest features and security enhancements that the updated version brings.
Uninstalling ExpressVPN from Ubuntu
If you no longer need ExpressVPN on your Ubuntu operating system, you can easily uninstall it without any hassle. Regardless of what version of Ubuntu you have, the process is straightforward and can be completed within a few steps.
Step 1: Disconnect from ExpressVPN
Before proceeding with the uninstallation, make sure you disconnect from ExpressVPN. This ensures that you won’t face any network or connectivity issues during the process.
Step 2: Open the Terminal
To uninstall ExpressVPN, you need to access the Terminal. You can do this by clicking on the Terminal app in your Ubuntu system.
Step 3: Remove ExpressVPN
Once the Terminal is open, type the command “sudo nano /etc/openvpn/expressvpn.conf” and hit enter. This opens the ExpressVPN configuration file.
Delete any lines related to ExpressVPN in the configuration file and save the changes.
Step 4: Remove ExpressVPN Installer and Files
To completely remove ExpressVPN from your Ubuntu system, you need to remove the installer and any associated files. You can do this by running the following command in the Terminal: “sudo apt purge expressvpn”.
Step 5: Clean Up Remaining Files
To ensure that all traces of ExpressVPN are removed, run the following command in the Terminal: “sudo apt autoremove”. This will remove any unused dependencies.
Conclusion
Uninstalling ExpressVPN from Ubuntu is a simple process that can be completed within just a few steps. By following these instructions, you can easily remove the software from your system and explore other VPN services if need be. ExpressVPN, with its best-in-class features and strict privacy policies, is one of the fastest and safest options for browsing the web securely and privately across various devices.
Frequently Asked Questions about Using ExpressVPN on Ubuntu
1. How does ExpressVPN work on Ubuntu?
ExpressVPN is a popular VPN service provider that supports Ubuntu operating system. It works by creating a secure and encrypted connection between your device and one of ExpressVPN’s servers located in various countries around the world. This allows you to browse the internet privately and securely while also benefiting from features such as accessing geo-restricted content.
2. Is ExpressVPN safe to use on Ubuntu?
Yes, ExpressVPN is considered safe to use on Ubuntu. The service operates under strict privacy policies, providing a secure and private connection for your internet activities. With ExpressVPN, your online traffic and personal information are encrypted, ensuring that your data remains protected from hackers, ISPs, and other third parties.
3. How can I install and setup ExpressVPN on Ubuntu?
To install and setup ExpressVPN on Ubuntu, you can follow these simple steps:
- Sign up for an ExpressVPN account and choose a plan.
- Download the ExpressVPN installer file for Linux from the official website.
- Open the terminal and navigate to the directory where the installer file is located.
- Run the command to install ExpressVPN using the filename of the installer file.
- Once the installation is complete, type “expressvpn” in the terminal to connect to a VPN server.
- Enter your ExpressVPN account credentials when prompted.
- Select a location server and click the “Connect” button to establish a VPN connection.
4. What features are available when using ExpressVPN on Ubuntu?
When using ExpressVPN on Ubuntu, you can enjoy a range of features, including:
- High-speed connections for fast browsing and streaming.
- Access to a large network of servers located in different countries.
- Support for multiple devices, allowing you to protect all your devices with a single account.
- The option to connect to VPN servers using various protocols like OpenVPN.
- Strict no-logs policy to ensure your online activities are not monitored or recorded.
5. Why should I choose ExpressVPN for Ubuntu?
There are several reasons to choose ExpressVPN for Ubuntu:
- ExpressVPN’s reputation as a reliable and trusted VPN provider.
- Fast speeds and stable connections for a seamless browsing experience.
- A wide range of server locations, allowing you to bypass geo-restrictions and access content from around the world.
- Easy installation and setup process for Ubuntu users.
- Regular updates and improvements to ensure compatibility with the latest Ubuntu version.
- Access to special deals and discounts available to ExpressVPN users.
6. How can I check my connection speed while using ExpressVPN on Ubuntu?
To check your connection speed while using ExpressVPN on Ubuntu, you can visit websites like speedtest.net or fast.com. These websites will give you an accurate measurement of your internet speed, allowing you to determine the performance of your VPN connection.
7. Can I use ExpressVPN on other Linux distributions besides Ubuntu?
Yes, ExpressVPN is compatible with various Linux distributions, including Ubuntu, Fedora, Debian, and CentOS. The installation process may vary slightly depending on the distribution, but the overall functionality and features of ExpressVPN remain the same.
8. Does ExpressVPN support the OpenVPN protocol on Ubuntu?
Yes, ExpressVPN supports the OpenVPN protocol on Ubuntu. OpenVPN is a popular and widely-used VPN protocol known for its security and stability. Using OpenVPN with ExpressVPN ensures that your internet traffic is encrypted and protected while using Ubuntu.
9. Can I use ExpressVPN on multiple devices with a single account?
Yes, ExpressVPN allows you to use their service on multiple devices with a single account. This means that you can protect all your devices, such as your computer, smartphone, tablet, and more, using just one ExpressVPN subscription.
10. Are there any better alternatives to ExpressVPN for Ubuntu?
While ExpressVPN is highly regarded and widely used on Ubuntu, there are also other VPN providers that offer similar functionalities. Some popular alternatives to consider include NordVPN, CyberGhost, and Surfshark. It’s recommended to explore these options and compare their features, pricing, and user reviews before making a decision.
11. How do I get support if I encounter any issues while using ExpressVPN on Ubuntu?
If you encounter any issues while using ExpressVPN on Ubuntu, you can reach out to ExpressVPN’s customer support team for assistance. They offer 24/7 live chat support and have an extensive knowledge base available on their website to help troubleshoot common issues.
12. Can I use ExpressVPN to download torrents on Ubuntu?
Yes, you can use ExpressVPN to download torrents on Ubuntu. ExpressVPN supports P2P file sharing and has specialized servers optimized for fast and secure torrenting. By connecting to these servers, you can download torrents privately and anonymously while keeping your IP address hidden.
13. I want to try ExpressVPN before committing. Do they offer a money-back guarantee?
Yes, ExpressVPN offers a 30-day money-back guarantee. If you’re not satisfied with their service within the first 30 days of your subscription, you can request a full refund. This allows you to try ExpressVPN risk-free and determine if it meets your needs.
How To Check If ExpressVPN Is Working On Ubuntu In 2023
If you’re using ExpressVPN on Ubuntu 2023, it’s crucial to check if it’s working properly to ensure your online privacy and security. Fortunately, checking the status of your ExpressVPN connection is a straightforward process that can be done within a few simple steps.
Step 1: Terminal and Command

Open the terminal on your Ubuntu device and enter the command expressvpn status. This command will display the current status of your ExpressVPN connection, indicating whether it is connected or disconnected.
Step 2: IP Address Check
To verify if ExpressVPN is working correctly, you can check your IP address. If you’re connected to ExpressVPN, your IP address should be different from your original one. You can use online tools or search “What is my IP address?” to check your IP information.
Step 3: Geo-Restricted Content
To further confirm ExpressVPN’s functionality, you can try accessing geo-restricted content. Connect to a server location that supports the content you want to access, such as streaming services or websites blocked in your region. If you can access the content without any issues, it means ExpressVPN is working correctly.
Step 4: ExpressVPN Features and Services
Explore the features offered by ExpressVPN, such as changing server locations or enabling the kill switch. If these features work as intended and provide the expected results, it’s a good indication that ExpressVPN is functioning properly.
Step 5: Check for Updates
Ensure that you’re using the latest version of ExpressVPN software by checking for updates regularly. ExpressVPN frequently releases updates to improve performance, fix bugs, and enhance security. Using the most up-to-date version is essential to ensure optimal functionality.
Conclusion
By following these steps, you can easily check if ExpressVPN is working on Ubuntu in 2023. Verifying the status of your connection, IP address, accessing geo-restricted content, exploring features, and keeping the software updated are all important aspects to ensure that ExpressVPN is working at its best and providing the utmost privacy and security for your online browsing.
Вопрос-ответ:
What is ExpressVPN and why should I use it on Ubuntu?
ExpressVPN is a virtual private network (VPN) service that allows you to create a secure and private connection to the internet. Using ExpressVPN on Ubuntu can help protect your online privacy, encrypt your internet traffic, and bypass geographical restrictions.
Can I use ExpressVPN on Ubuntu without installing the app?
Yes, you can set up ExpressVPN on Ubuntu without installing the app by manually configuring the VPN connection. ExpressVPN provides detailed tutorials on how to set up the VPN connection using different protocols such as OpenVPN or IKEv2. However, using the official app provides a more user-friendly and convenient experience.
How do I know if ExpressVPN is working on my Ubuntu?
To check if ExpressVPN is working on your Ubuntu, you can visit websites like ipconfig.io or ipleak.net. These websites will show you the IP address and location that websites see when you’re connected to ExpressVPN. You can also use the ExpressVPN app to confirm your connection status.
Can I use ExpressVPN on other Linux distributions besides Ubuntu?
Yes, ExpressVPN supports a wide range of Linux distributions, including but not limited to Ubuntu, Debian, Fedora, and CentOS. You can find detailed installation instructions and tutorials for each specific distribution on the ExpressVPN website.
Видео:
EXPRESSVPN AMAZON FIRESTICK & FIRE TV EASY TO INSTALL & USE (BEST FIRESTICK VPN 2021)
EXPRESSVPN AMAZON FIRESTICK & FIRE TV EASY TO INSTALL & USE (BEST FIRESTICK VPN 2021) by Lewis T 3 years ago 8 minutes, 42 seconds 51,689 views